接入前准备
记一下最近的笔记,本文使用的项目Expo开发,使用dev-client构建来进行的真机测试。
由于通知服务只支持物理设备,所以为了方便调试,使用eas的开发构建打包
需要一个谷歌账号,一个苹果开发者账号,iOS真机,Android真机调试。
需要Firebase云消息服务(FCM),APN(苹果通知)。
接收推送
调整eas配置
调整eas.json如下:我们在其中一个构建(这里是preview)里加上
"preview": {
        "developmentClient": true,
        "android": {
        "buildType": "apk",//apk方便android测试
      },
      "distribution": "internal"
    },
"developmentClient": true
安装通知包
npx exop install expo-notifications
配置App.json
插件部分设置小图标和声音。
"plugins": [
      [
        "expo-notifications",
        {
          "icon": "./local/assets/notification-icon.png",
          "color": "#ffffff",
          "sounds": [
            "./local/assets/notification-sound.wav",
            "./local/assets/notification-sound-other.wav"
          ]
        }
      ]
    ]
配置APP.js
首先创建一个工具函数,来实现通知服务的注册与通知权限的申请。
import * as Device from 'expo-device';
import * as Notifications from 'expo-notifications';
import {Platform} from "react-native";

// 后端测试通知 https://expo.dev/notifications
export async function registerForPushNotificationsAsync() {
    let token;
       console.log('test notify')
        token = (await Notifications.getExpoPushTokenAsync({
            //这里更换expo用户名/slug
            experienceId:"@yfd/w-rtk"
        })).data;

           console.log('token')
           console.log(token);

    if (Device.isDevice) {
        console.log('获取通知权限')
        const { status: existingStatus } = await Notifications.getPermissionsAsync();
        let finalStatus = existingStatus;
        console.log(finalStatus)
        if (existingStatus !== 'granted') {
            const { status } = await Notifications.requestPermissionsAsync();
            finalStatus = status;
        }
        if (finalStatus !== 'granted') {
            alert("未授予通知权限")

            return;
        }

        console.log(token);
    } else {
//        alert("推送限制真机")
        console.warn("非物理设备,推送不可用")
    }

    if (Platform.OS === 'android') {
        Notifications.setNotificationChannelAsync('default', {
            name: 'default',
            importance: Notifications.AndroidImportance.MAX,
            vibrationPattern: [0, 250, 250, 250],
            lightColor: '#FF231F7C',
        }).catch((er)=>{
            console.log('error')
            console.error(er)
        })
    }

    return token;
}
我们这里使用expo的推送,由他接管FCM与APN,也可以自行接入后端。首先注册expo的设备id(后期推送使用),注册后,一般情况不会更改一直有效(除非卸载,或者主动变更)。这个token这里暂时用不上,一会测试使用这个(注册后提交到后端,根据token来识别推送设备)
expo通知流程

设置监听
在app.js里设置通知。
Notifications.setNotificationHandler({
  handleNotification: async () => ({
    shouldShowAlert: true,
    shouldPlaySound: false,
    shouldSetBadge: false,
  }),
});
  useEffect(() => {
    //使用刚才的工具函数注册设备
    registerForPushNotificationsAsync().then(token => setExpoPushToken(token));

       //应用在前台监听回调
    notificationListener.current = Notifications.addNotificationReceivedListener(notification => {
      setNotification(notification);
    });

    //后台通知触发回调
    responseListener.current = Notifications.addNotificationResponseReceivedListener(response => {
      console.log(response);
    });

    return () => {
      Notifications.removeNotificationSubscription(notificationListener.current);
      Notifications.removeNotificationSubscription(responseListener.current);
    };
  }, []);
到此准备好了接收,需要构建一个测试包了。
构建android
eas build --platform --profile preview
构建iOS
eas build --platform ios --profile preview
iOS需要提交Testflight安装到设备。
启动开发调试
eas start --dev-client
打开手机上的应用,应该是expo的工具,输入本地调试地址,局域网加入连接。
发送推送
配置firebase
打开控制台设置新的项目Firebase,创建的android项目包名要一致。随后下载google-services.json文件。放入RN项目里。更改app.json->android配置:加入文件路径
"android": {
    "googleServicesFile": "./google-services.json"
  }
上传凭证到expo后台
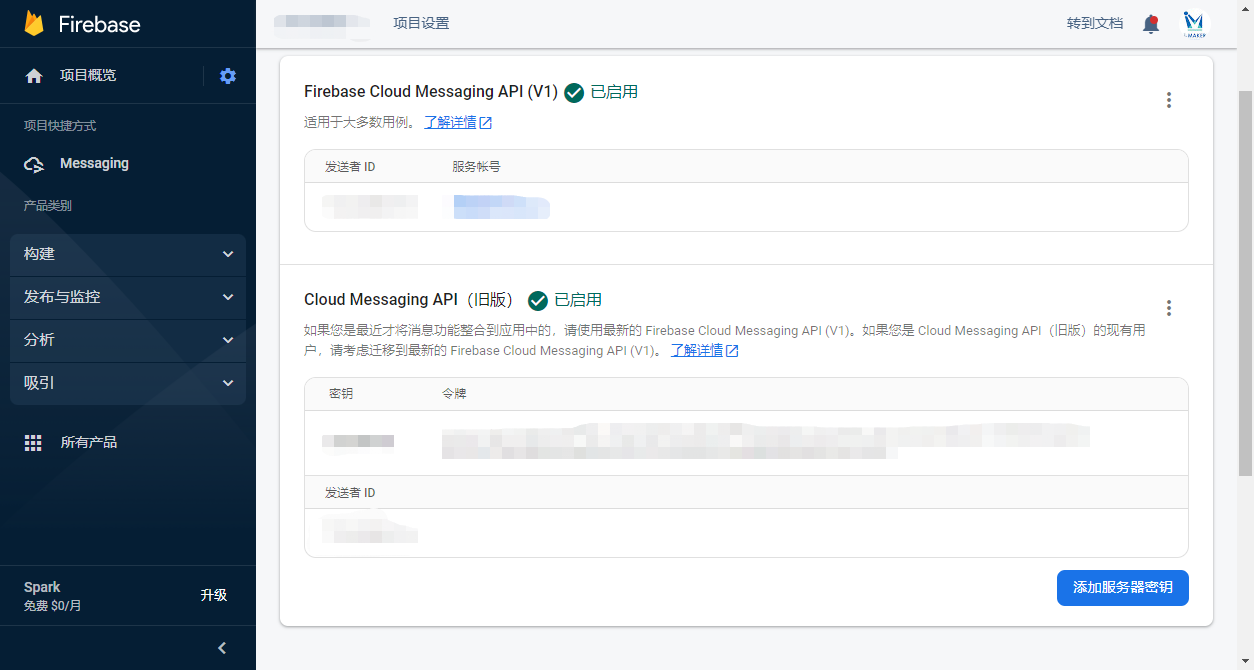
在firebase这里,找到密钥复制下来,打开expo后台该项目找到凭证上传,找到FCM,添加即可,也可以在本地使用终端:expo push:android:upload --api-key xxxtoken
配置完成后 使用 expo推送工具测试 其中 To (Expo push token from your app) 就是刚才的设备token。
点击发送后,手机应该已经收到了,小米设备可能被折叠在其他通知里,注意不要发送随意的字符,会被折叠。

为什么没有APN的配置,因为eas submit的时候会自动帮你配置,手动狗头。